Address Autocomplete 2.0 is now available for both Address Autocomplete Anything (the free version) and Address Autocomplete Premium. Most of this release is about getting set up, from your Google key to finding the right fields on your form, and nearly all of it is in the free version too.
Places API (New)
Since March 1, 2025, Google hasn’t let new Google Cloud projects turn on the legacy Places API, which is the one Address Autocomplete used to need.
Address Autocomplete 2.0 works with Places API (New), so a key from a brand new Google Cloud project works with it. If your site already shows address suggestions with the legacy API, it stays on the legacy API after you update, and you can switch whenever you like by turning on Places API (New) in Google Cloud and changing one setting.
Your visitors won’t see a difference, because the suggestions still show up right under the address field that’s already on your form. Google’s own autocomplete for Places API (New) adds a separate address box to the page, which doesn’t work well inside other plugins’ forms, so Address Autocomplete asks Google for the suggestions and shows them under your own field instead. The legacy vs new doc covers which one to pick.
Field Picker
Before 2.0, setting up a form meant finding the CSS selector for each address field yourself, which is a lot to ask of someone who doesn’t build websites. The field picker finds the address fields for you, and it’s in the free version as well as Premium.
Choose the page with your form and click Pick fields, and your page opens with a green tag on each address field it found, like “Street address”, “City” and “Country”. If it tags something wrong you can click that field and choose what it’s for. If a field stays hidden until someone clicks something, like the second step of a form, you can pause the picker, open that part of the form, and then pick the field.
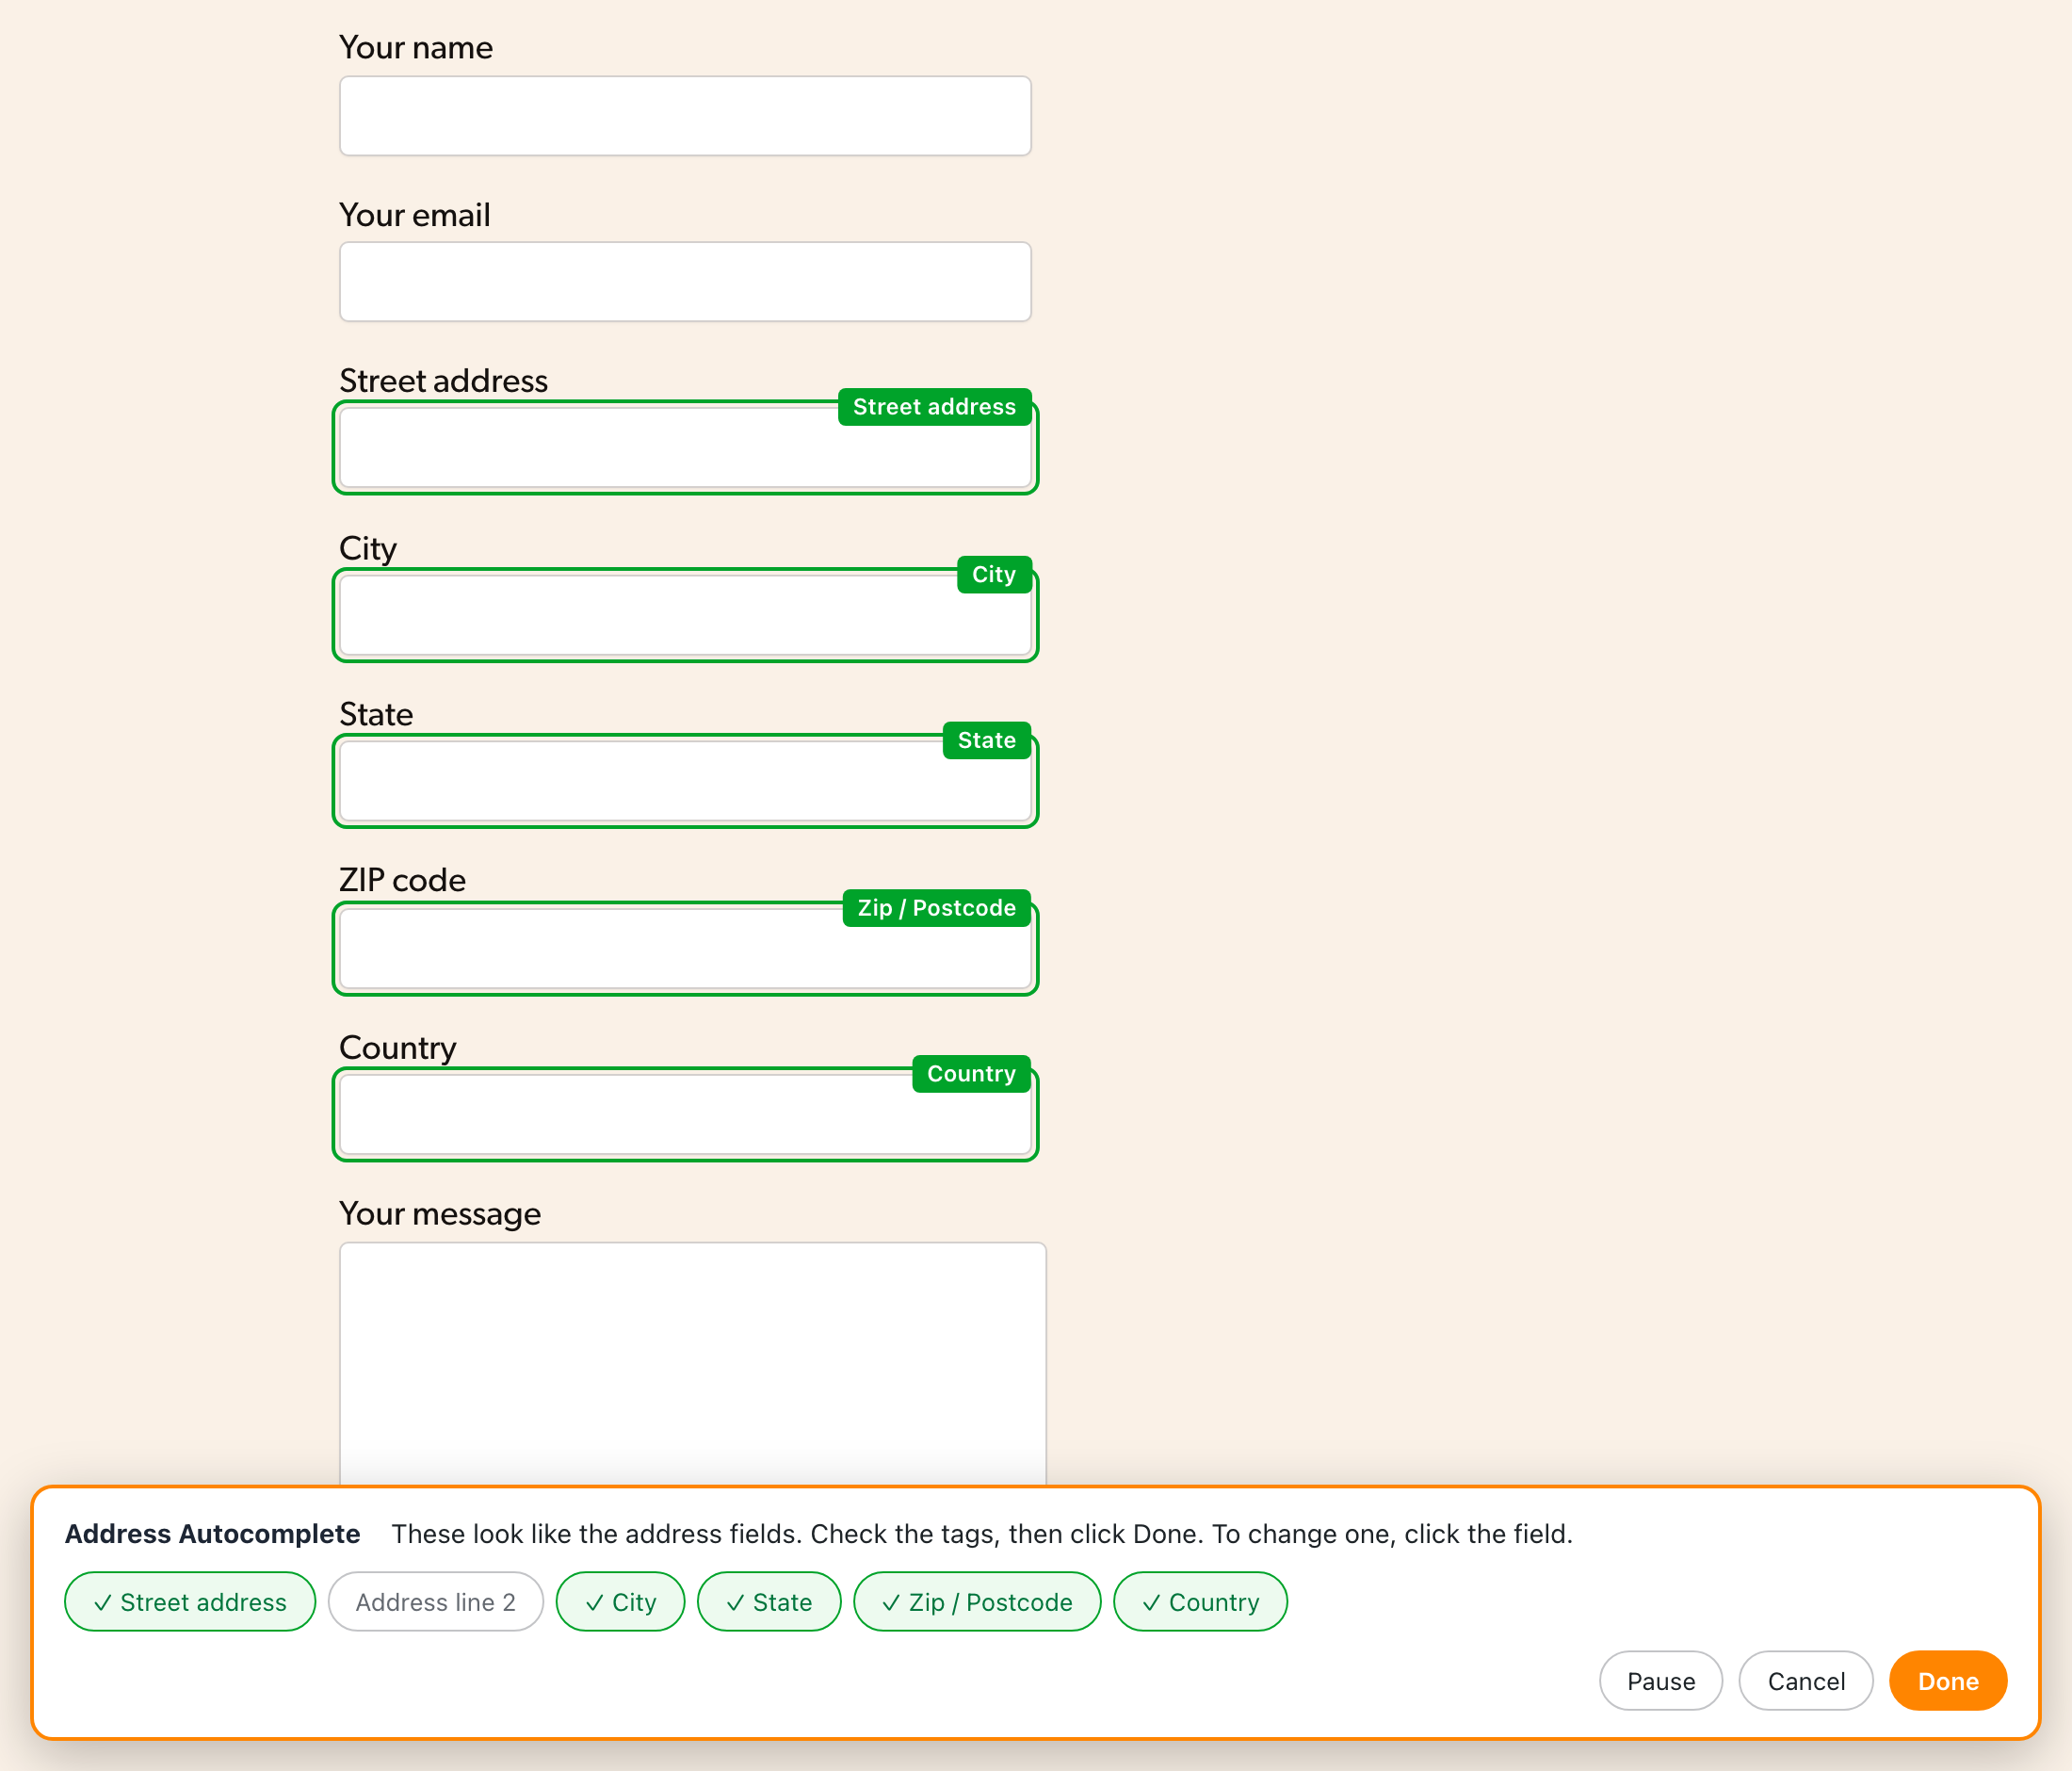
There’s a short video on the field picker, and the field picker doc goes through each step.
Setup Wizard and Test Key Button
A setup wizard now opens the first time you turn on the plugin and walks you through adding your Google key. The Google key is the part of setup with the most steps, so the new Test key button checks your key with Google and tells you in plain words what to fix. It also tells you which of the two Places APIs your key works with, and if you picked the wrong one in the settings, it says which one to choose instead.
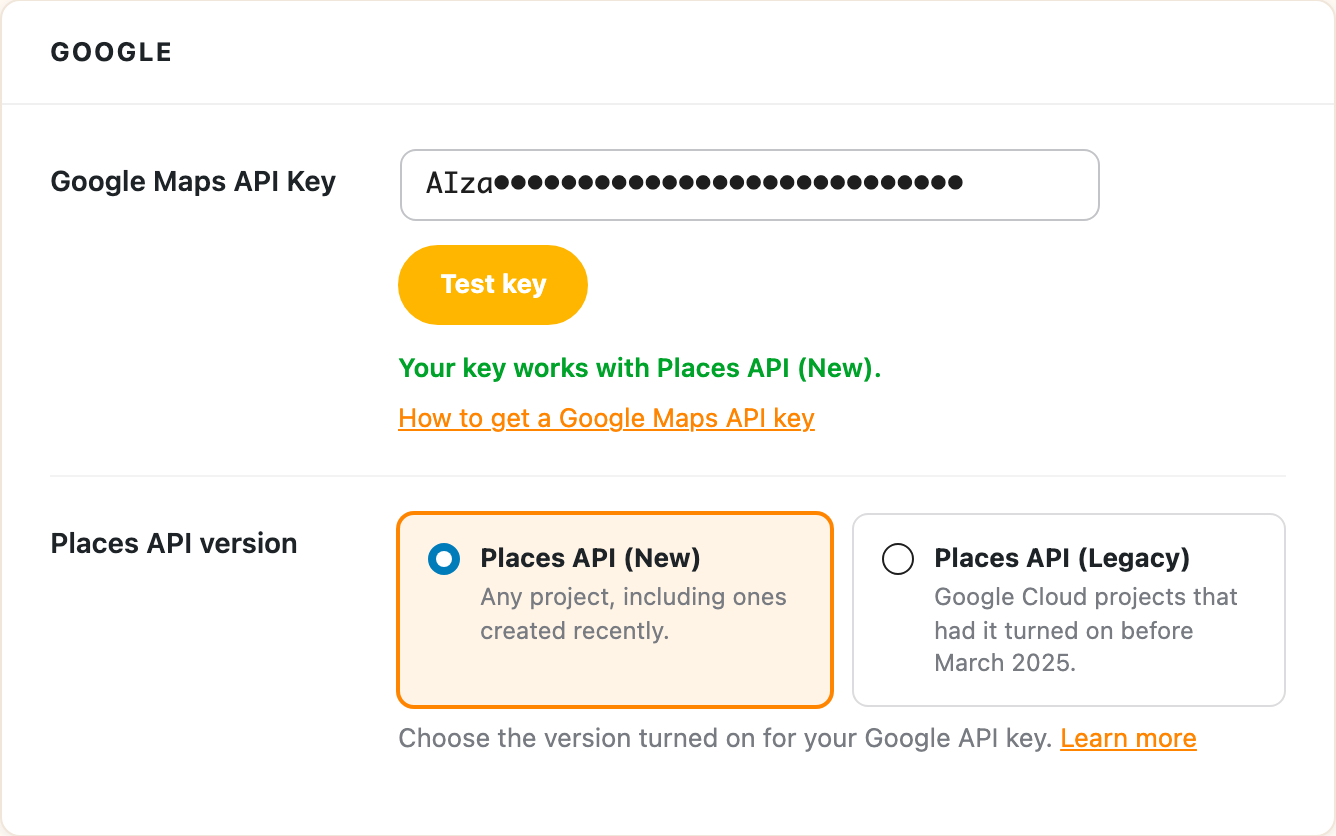
If you haven’t made a key yet, the Google Maps API key doc and this video on getting a key walk through it.
One-Click Integrations
Address Autocomplete Premium now has one-click setup for 11 plugins. The six new ones are Charitable, FluentCart, GiveWP, MemberPress, Paymattic and Tutor LMS, and they join WooCommerce, Easy Digital Downloads, Gravity Forms, Paid Memberships Pro and LifterLMS. Turning one on sets up the address fields for that plugin’s checkout or forms, so you don’t need the field picker for those. In Premium, the setup wizard also shows you the integrations for the plugins already on your site.
Redesigned Settings Screen
The settings screen is redesigned, and the fields each form fills in now show as easy-to-read tags instead of template codes like {city}. Your saved setups stay the same.
Other Updates
- The setup wizard offers to sign you up for update emails, and nothing is sent unless you choose to sign up.
- Premium checks your license once a week. One-click integrations need an active license, so they turn off if it expires and come back with your settings when you renew.
- If both the free plugin and Premium are turned on, update the free one to 2.0 or turn it off, since Premium already includes everything in it.
- Address Autocomplete now needs WordPress 5.3 or newer.
Phew! If you already use Address Autocomplete, 2.0 is waiting as a normal update on your Plugins page. If you haven’t tried it yet, the free version is on WordPress.org, and the Address Autocomplete page shows what Premium adds. Thanks so much for reading about everything new in Address Autocomplete 2.0.